SharePoint PowerShell Restore Recycle Bin

I would not identify myself as a programmer or developer but I certainly enjoy technology and writing scripts to solve problems that I encounter. I am pretty comfortable in my Microsoft Excel formulas and my ability to diagnose problems. I understand the logic that needs to happen but not the syntax to make it happen.

Earlier today I had an employee accidentally delete some 40,000 objects from my SharePoint Document Library that is shared company-wide. The browser tools with SharePoint Online (2016) only gave me the ability to restore a few files or folders at a time. I decided to try to solve my problem with PowerShell. I was not that familiar with the PnP PowerShell tools but they helped me solve my problem:

First, I launched PowerShell in administrator mode and installed the PowerShell Gallery:

Install-Module SharePointPnPPowerShellOnline

Second, I got connected to my SharePoint Online:

Connect-PnPOnline -Url https://contoso.sharepoint.com

Third, I wrote a script to see if I could see a count of the files in the recycle bin:

#Count of the Items in the First Stage Recycle Bin
(Get-PnPRecycleBinItem -FirstStage).count

I noticed that it included folders and only wanted to restore the files. SharePoint will restore the folder structure automatically. So I cleaned up my scrip to only include files:

#Show Count of “File” in the First Stage Recycle Bin
(Get-PnPRecycleBinItem -firststage | ? ItemType -like "File").count

Finally, I was able to use my script that would restore the 40,000 files:

#Restore All “File” in the First Stage Recycle Bin
Get-PnPRecycleBinItem -firststage | ? ItemType -like "File" | Restore-PnpRecycleBinItem -Force

There were a few phone calls to consultants that were not of much help. I am posting this online in hopes that it might be helpful to others. Enjoy!
Multimedia Engineer

Saturday, 2 March 2013, 3:41pm

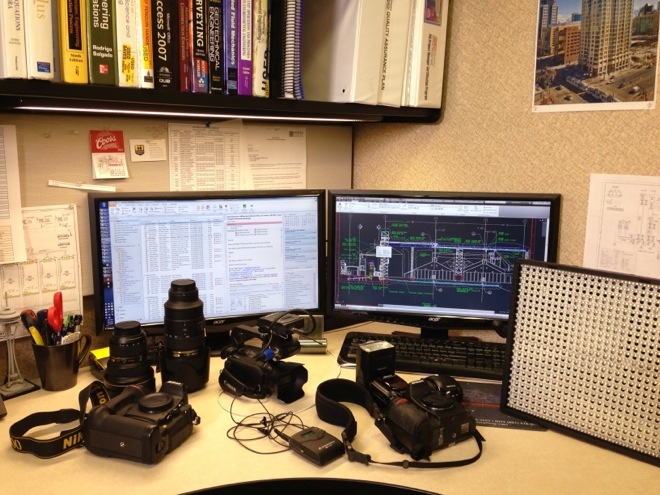
Multimedia Engineer! Work is keeping me busy today with a fun new project involving the production of safety training videos and other various marketing materials. It is fun that my personal hobbies often translate into projects for work.

20130302-154418.jpg

Detailed Tacoma Truck

Saturday, 4 June 2011, 1:37pm

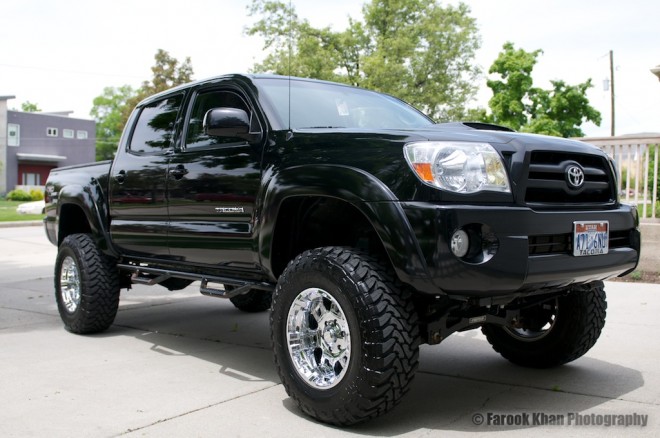
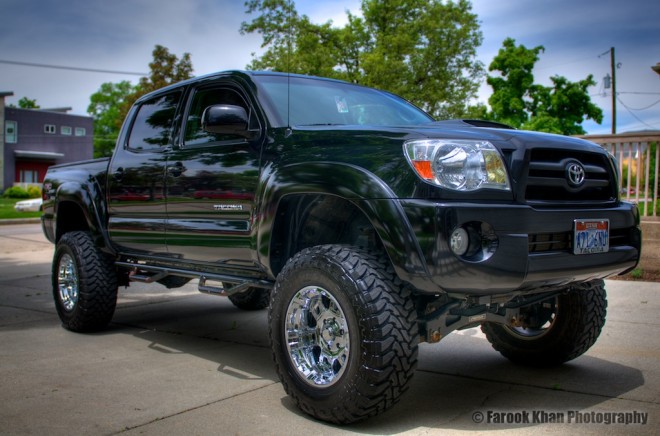
Detailed Tacoma Truck! It has been a beautiful week in Salt Lake and the weather finally getting warm. Every so often I like to pamper my truck with a nice detailing and cleaning. The shop does a great job and they have a professional crew comb through every edge to make sure the truck is looking its best. Although the truck is starting to show its age, I still like to keep it clean and looking sharp.

I took a few images with my phone and the sunlight was a little too harsh so I grabbed my Nikon D300 and turned on exposure bracketing to convert this to a HDR (High Dynamic Range) image. Unlike my Classic Car HDR images which have a very cartoonish feel, with a few changes of the setting you can make an HDR image look very sharp and clean. I’ve included the “standard” non-edited image and the image after the exposure bracketing merge and minor adjustments.

Images (actually seven bracketed images) were taken with my Nikon D300 with my AF-S NIKKOR 24-70mm f/2.8G ED lens without a tripod. The HDR merge was performed via Photomatix Pro and then brought back into Aperture 3. Enjoy!

Toyota Tacoma 2007 Truck

Website Redesign

Monday, 30 May 2011, 12:54am

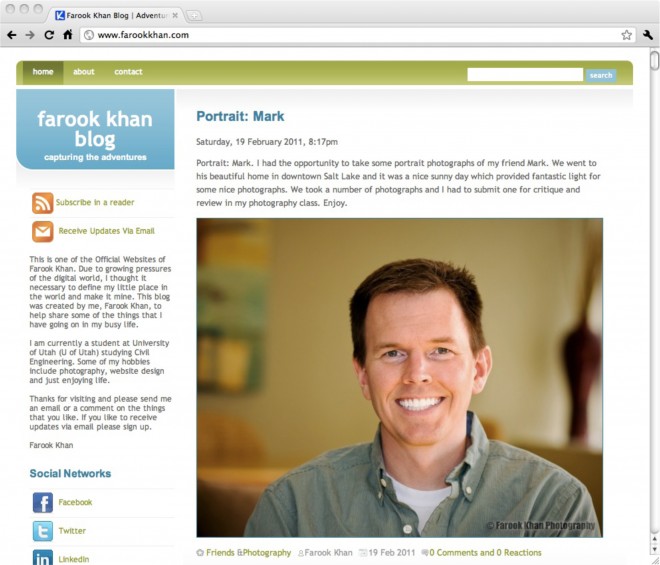
Website Redesign! Earlier this weekend while working on various projects I had the thought that my website was looking a little out of date and never really had the right design for my tastes. After spending a few minutes looking through WordPress.org’s extensive theme collection, I came across one that was designed by a developer in Sweden. The theme is called “The Common Blog” and had most of the elements I was looking for my site and figured I could add any element(s) that were missing.

After downloading the files and exploring the theme on my test server I was able to make some changes to the theme to meet my needs. Some of the core strengths that attracted me to this theme were the open spaces and larger fonts. It seems cleaner and easier to read. My previous theme also had a large variety of different colors that I found distracting to my photographs. This redesign has me going in the right direction but there are still lots of little details that I haven’t tested or investigated.

This a screen shot of my website that I captured a few months ago:

It is a little sad to see that old design going away. Luckily I still have all the files and if I ever want to revive it, the process would take a few minutes because I have all the source information.

Feel free to let me know what you think of the redesign and if there is anything that seems broken. I like to think of websites as complex machines that have many bells, levers and controls and changing any one can make or break the system. Enjoy!

Farook’s Dream Computer

Sunday, 10 May 2009, 9:45pm

Happy Mothers Day! I bought a new computer back in March and I have yet to post any pictures of my dream machine to my blog. While I was sitting at my computer today, I decided to download the new Windows 7 operating system and run it on my new MacPro using VMFusion. After about one hour of downloading the 3.2 GB file from Microsoft I was able to get it up and running on my machine. I am actually writing this post in Google Chrome on my Windows 7 Virtual Machine on my MacPro.

I finally saved up enough money and Apple finally released an updated MacPro and I went and purchased it. Here are a few technical details that some of you might be interested in:

  • 8-core: Two 2.66GHz Quad-Core Intel Xeon 5500 series processors
  • 16GB of 1066MHz DDR3 ECC SDRAM
  • NVIDIA GeForce GT 120 with 512MB of GDDR3 memory, PCI Express 2.0, one Mini DisplayPort, and one dual-link DVI port
  • Two 1TB Serial ATA 3Gb/s, 7200 rpm, 32MB cache
  • 18x SuperDrive with double-layer support (DVD±R DL/DVD±RW/CD-RW)
  • Four FireWire 800 ports (two on front panel, two on back panel)
  • Five USB 2.0 ports (two on front panel, three on back panel)
  • Two USB 2.0 ports on included keyboard
  • Front-panel headphone minijack and internal speaker
  • Optical digital audio input and output TOSLINK ports

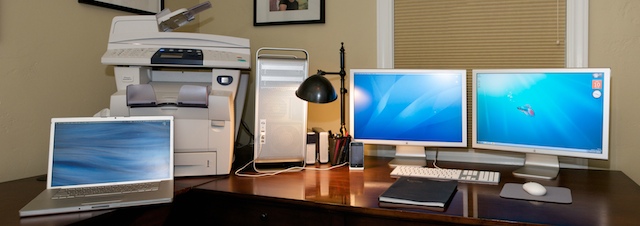
I am also sporting two Apple Cinema 23″ Displays that really complete my dream machine. I still have my trusty MacBook Pro 15″ laptop that I take with me to school and work. It has been relieved from running my massive photograph (120GB), movie (500GB) and music (140GB) collections to simply surfing the internet and checking email with an occasional document that needs to be created.

Take a look at the picture of my current set up, you can also see my iPhone 3G that completes the machintosh setup along with my Xerox Phaser 8560 MFP that handles all my printing, scanning and copying. I hope to write more indepth reviews and commentaries on the machines that do my work. I use to store all my media on two Other World Computing Mercury Elites that you can see sitting next to my MacPro. They now mainly serve as secondary backups. I’ll have to write more about my backup master plan.

Farook's Dream Machine

If you look closely, I have Windows 7 running on my right display and Mac OS X running on the left screen and also my laptop. On a side note, I took several photographs and stitched them together with photoshop. I haven’t done that in a while and thought I would see if it was still functioning. I am extremely happy with my setup and love my computers!

Farook Khan